Set up an audience segment that you can use to run remarketing campaigns to drive sales, leads, or traffic to your website.
Goal: Successfully set up a remarketing audience for your retargeting campaigns.
Ideal Outcome: An up-and-running Google search remarketing ad campaign to drive sales, leads, or traffic to your website.
Why this is important: Users who already know your business are more likely to convert. Hence, targeting these potential customers are great low hanging fruit opportunities.
Where this is done: Google Ads Manager.
When this is done: When you wish to target customers who have interacted with your website, app, or YouTube channel and convert them into leads or customers.
Who does this: The person responsible for media buying.
Prerequisites or requirements: You will need a Google Ads account. If you don’t have one, please follow SOP 014 (web version): Create a Google Ads account.
Set up a new audience segment
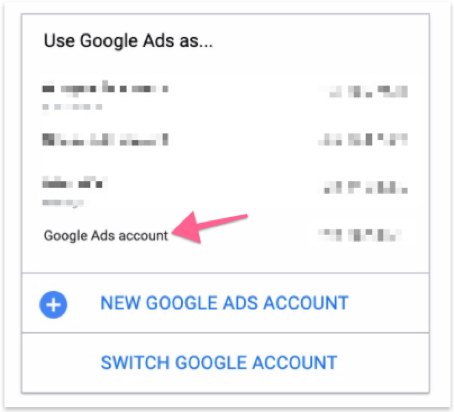
01▸ Head to https://ads.google.com/and log in to your account.
02▸ Select an account that you want to create for the remarketing campaign.
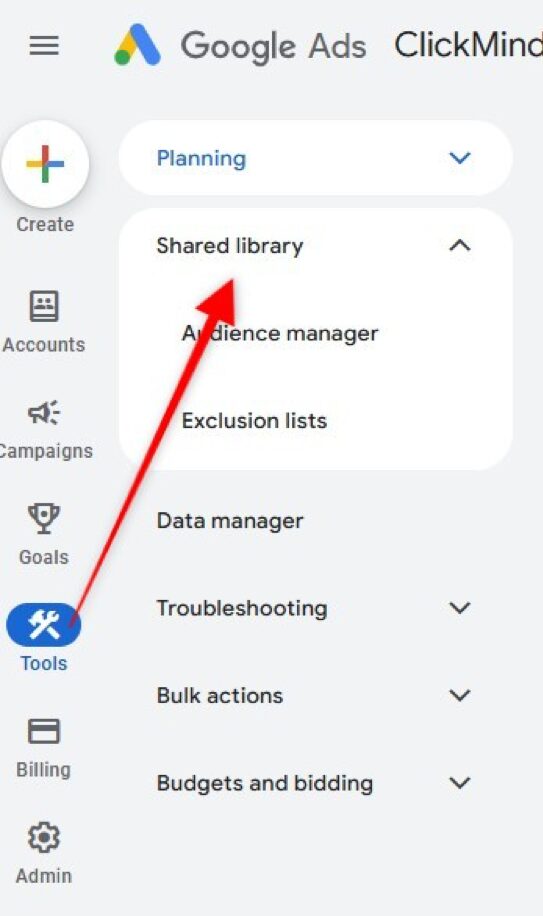
03▸ On the left navigation menu, click “Tools” and look for “Shared Library”.
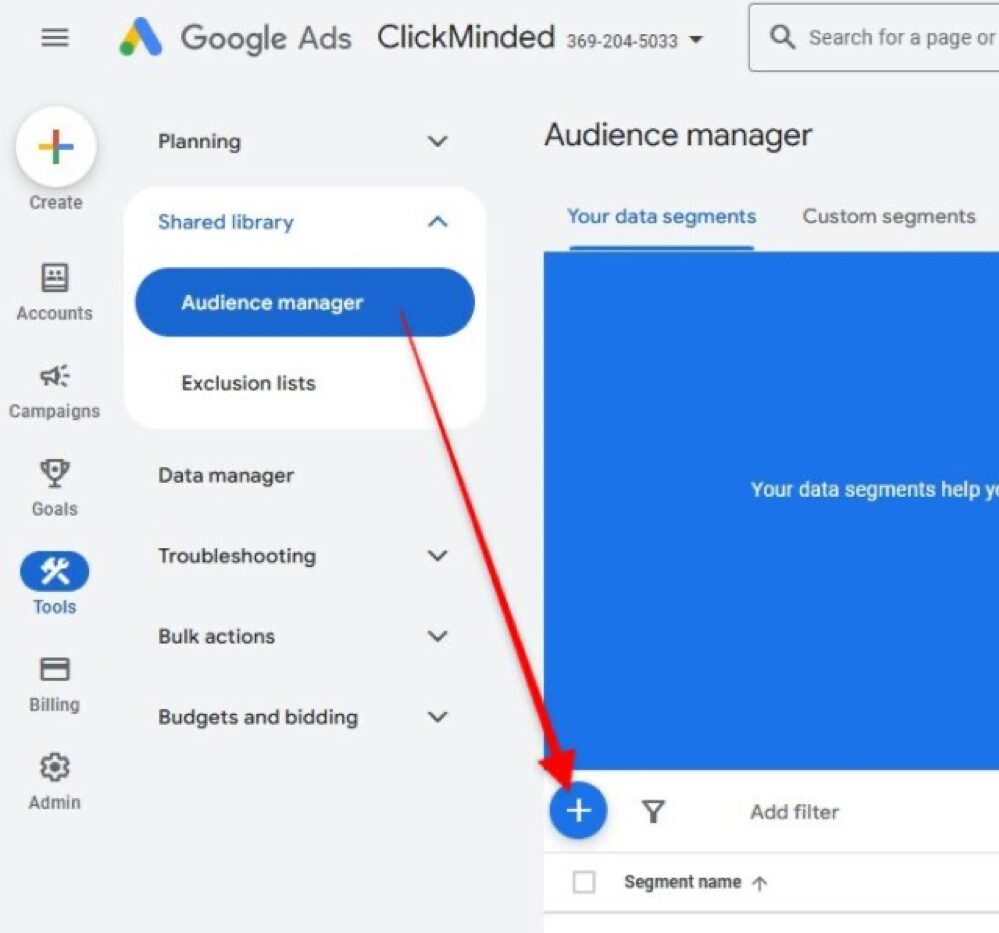
04▸ In the “Shared library”, click “Audience Manager” followed by the “+” icon.
05▸ For this SOP, select “Website visitors”.
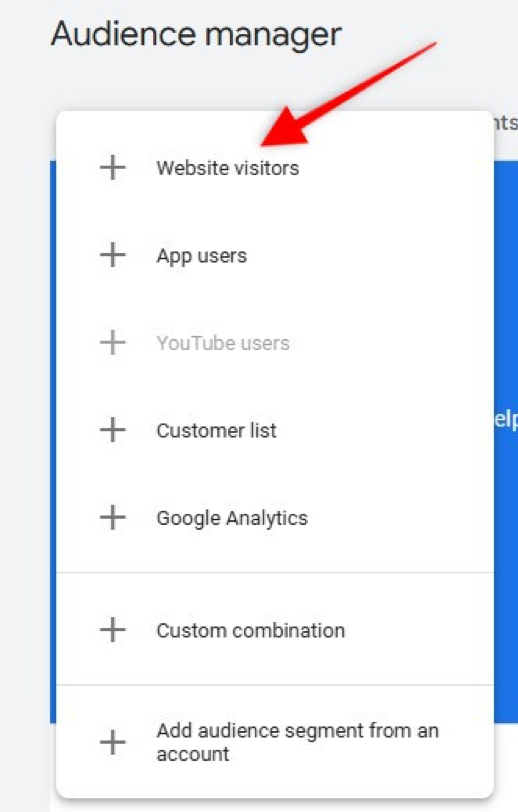
In Google Ads Manager, you have several options to create an audience for your campaign, including integration with Google Analytics, custom combinations, and adding audience segments from an account. Here’s an overview:
- Website Visitors: Target users who have visited specific pages on your website.
- App Users: Engage with users who have downloaded or interacted with your app.
- YouTube Users: Reach users who have interacted with your YouTube channel or watched your videos.
- Customer List: Use your customer data (e.g., email lists) to target existing customers.
These options allow for precise audience targeting to enhance campaign performance.
06▸ Fill in the details for the audience segment.
a) Segment name — A name to help you identify this target audience.
b) Customer type – Define your customer group to reach the objective of your campaign. c)Segment members — Select the type of users who have interacted with your website. d)Actions — The “Actions” section is where you create a set of rules for what should happen with a particular group of people.
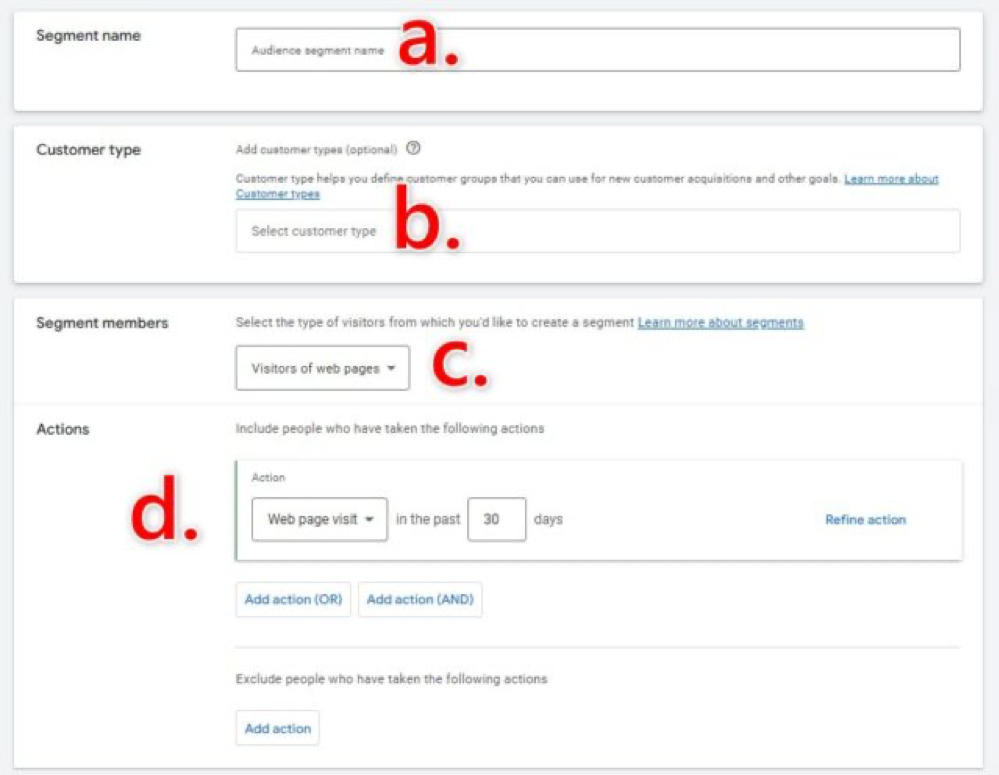
You can make rules based on one thing they do, many things they do, or things they shouldn’t do. For each rule, pick something from a list and say how many days it should apply for. The default option in the list is “Web page visit,” but there could be other choices based on the parameters in your website tag. The following tag parameters will populate additional options in the “Action” drop-down menu:
- dynx_pagetype
- ecomm_pagetype
- edu_pagetype
- event
- flight_pagetype
- hotel_pagetype
- hrental_pagetype
- job_pagetype
- listing_pagetype
- local_pagetype
- page type
- travel_pagetype
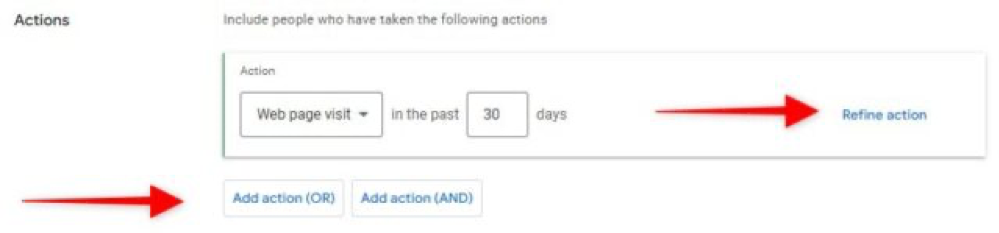
- To be more specific about the web pages people visit, Click “Refine action” to add parameters for web pages on your site where you’d like to collect visitor cookies. You can use words, numbers, or dates depending on the rule you’re making.
- Once you finish one rule, you can add more by clicking “Add action (OR)” or “Add action (AND)” based on how you want the rules to work together.
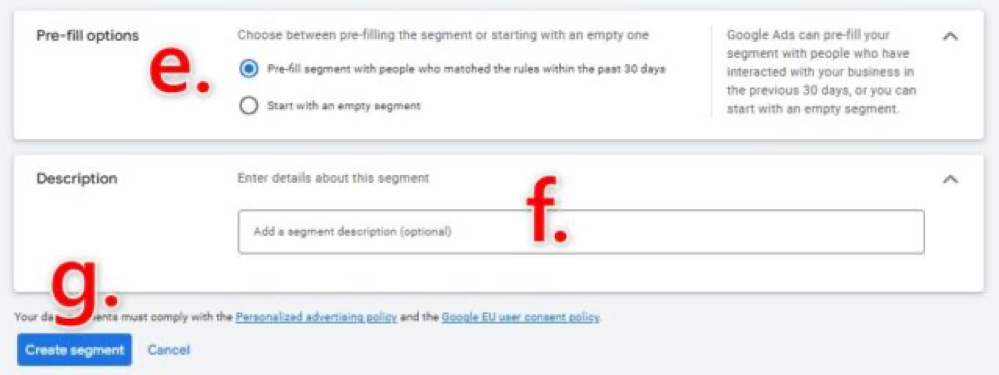
e)Pre-fill options — Allow Google to populate this segment with users who have interacted with your website in the last 30 days (Default). Otherwise, you can start with an empty segment. f)Description – Enter details about the segment. This is optional. g)Create Segment — Click to complete this audience segment.
07▸ You have now created a new segment of users who have visited your website. If the segment is set up correctly, you should be able to see how many people are currently in this segment.
