Build a GoHighLevel workflow that assigns new leads to owners and sends internal notifications. Covers form and inbound call triggers with optional automatic opportunity creation.
Goal: Route new leads from forms and inbound calls to an owner and alert them instantly.
Ideal Outcome: New leads are assigned within 1 minute, the owner receives email and SMS, and (optionally) an opportunity is created in the correct pipeline/stage.
Why this is important: Fast assignment and alerts reduce time-to-first-touch and prevent dropped leads.
Where this is done: GoHighLevel (Sub-account).
When this is done: Set up during onboarding or before campaigns go live; update when users or pipelines change.
Who does this: GoHighLevel admin permissions to create workflows and manage users.
Prerequisites or requirements: You need GoHighLevel (Sub-account) access.
Build and publish a routing workflow
You’ll build a GoHighLevel workflow that automatically routes new leads from forms and inbound calls, assigns them to a sales owner, and sends instant email/SMS alerts. We use one admin-level workflow to balance workload and add a short delay before notifications so ownership fields are set correctly.
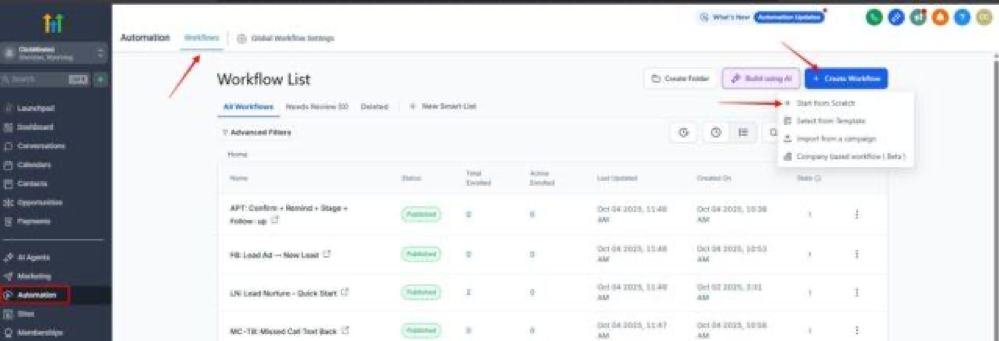
01▸ Go to “Automation” → “Workflows” → “Create workflow” → “Start from scratch”. 
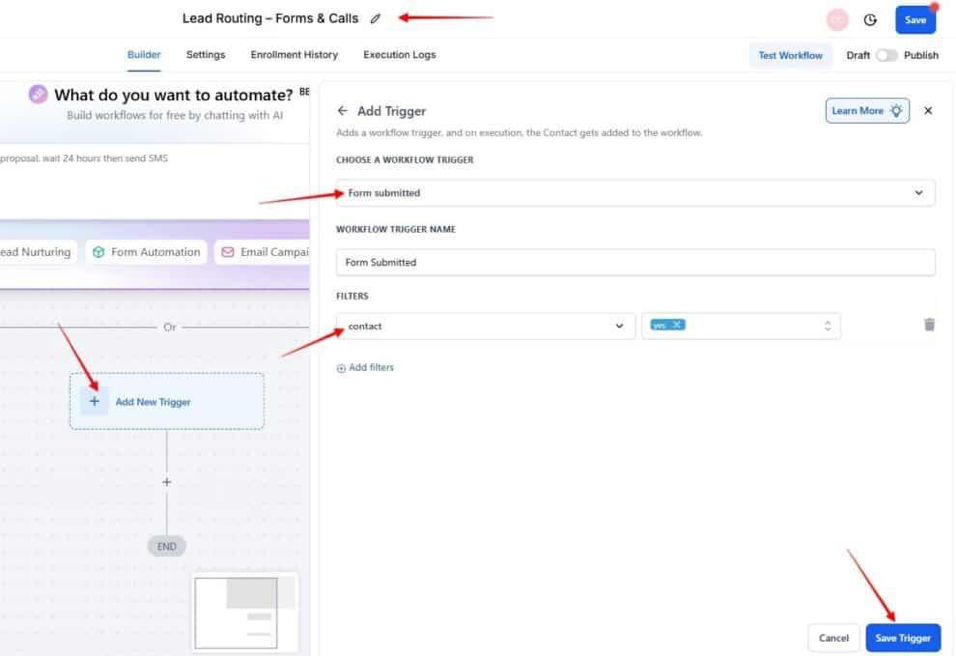
02▸ Name the workflow “Lead Routing – Forms & Calls”, add a trigger “Form Submitted” and select a filter. Click “Save Trigger”.
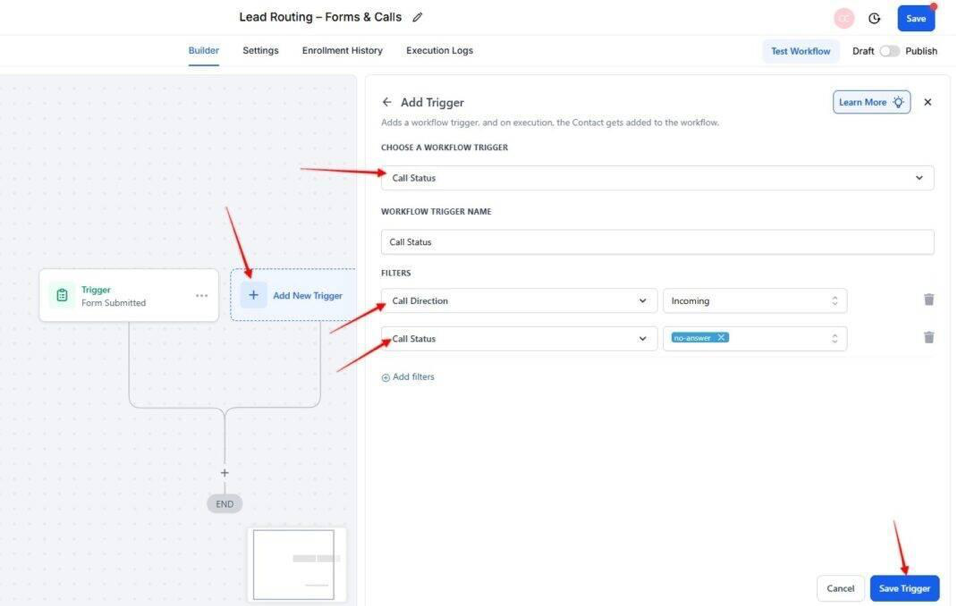
03▸ Add another trigger “Call Status” with filters: “Call Direction” = “Incoming” and “Status” = “No-answer”. Click “Save Trigger”.
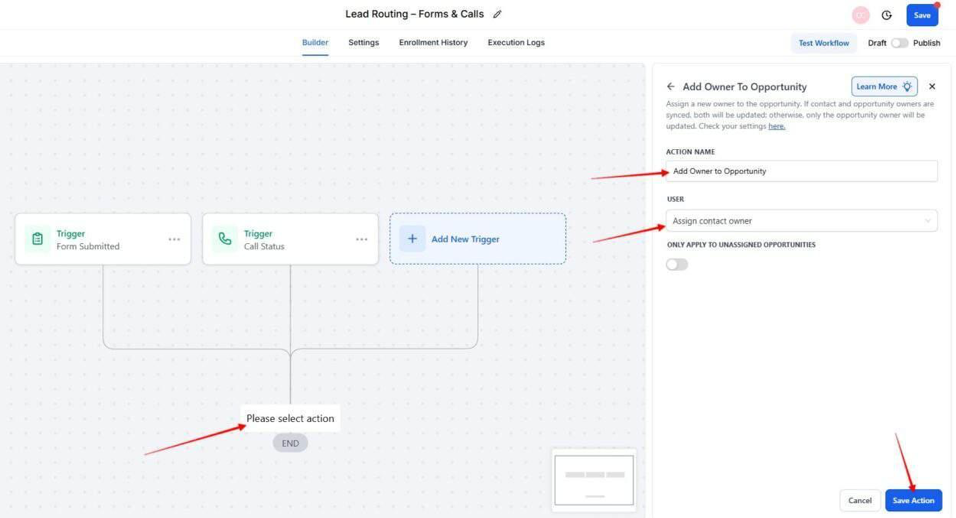
04▸ [Optional] Add an action “Add Owner to Opportunity” and set it to a default user. Click “Save Action”.
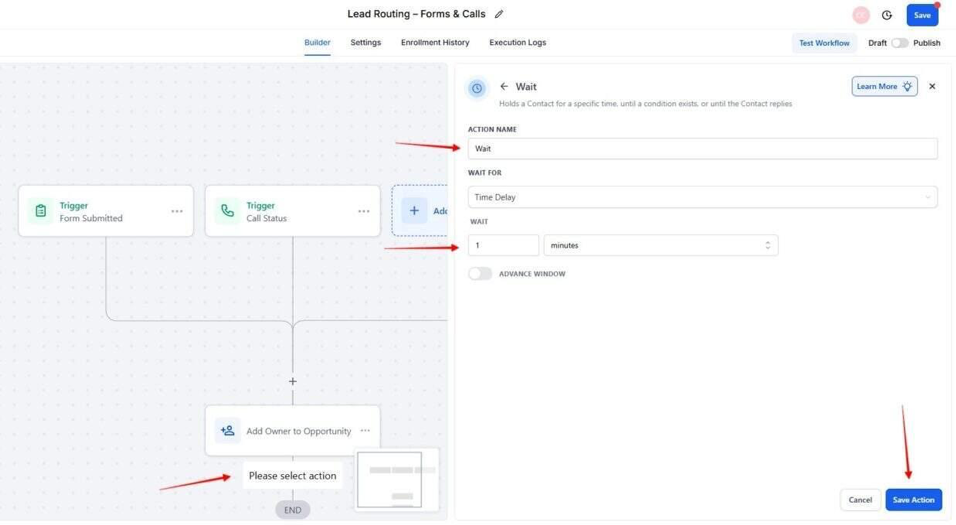
05▸ Add another action “Wait” for duration = 1 minute. Click “Save Action”.
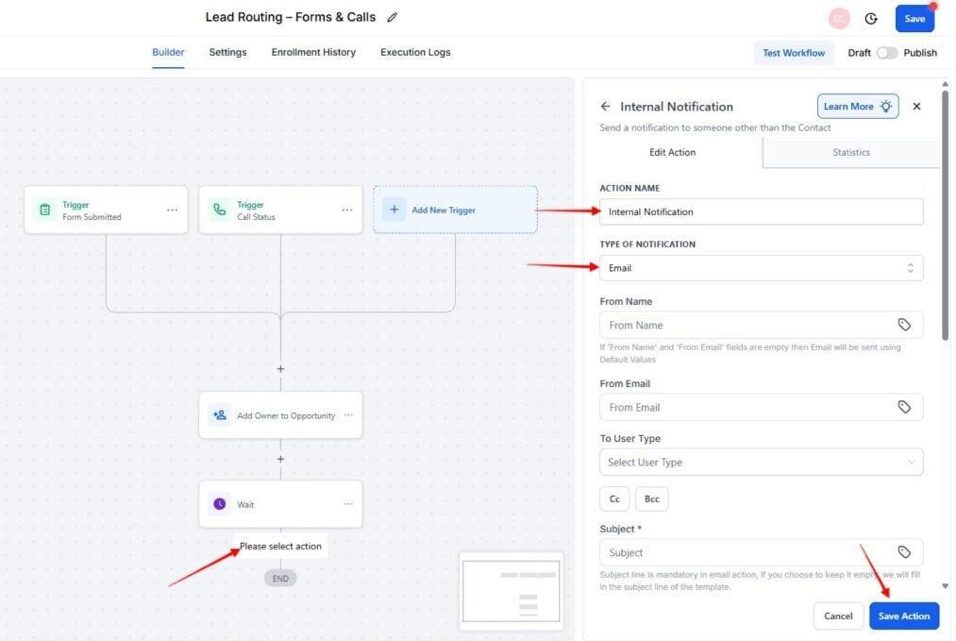
06▸ Add another action “Send Internal Notification” (Email and SMS) to contact the owner. Click “Save Action”.
07▸ Publish the workflow by toggling from draft to publish.
After publishing, submit a form and place a new inbound call. Confirm the lead is assigned in under 1 minute, and the owner receives both an email and an SMS with the lead details. If you enabled Opportunities, check the Pipeline and Stage for the new record.
Test form and call paths
Now it’s time to test both the form path and the inbound call path. You’ll submit a form and place a new call to confirm that owners are assigned correctly, notifications are delivered, and (if enabled) opportunities appear in the right pipeline stage. This ensures the workflow reliably handles real-world lead entries without dropping them.
01▸ Submit a live lead form with fresh test details (new email/phone).
02▸ Wait one minute after form submission.
03▸ Go to “Contacts” and open the new test contact.
04▸ Confirm the contact owner field is populated with one of the users.
Processing may take a short while, so allow up to a minute to see ownership assigned.
05▸ [If enabled] In “Opportunities”, confirm a record exists in the “Status Open” card.
If you chose to create opportunities automatically, check “Opportunities” for a new card in the correct pipeline and stage with status set to open.
06▸ Open the assigned user’s email inbox.
07▸ Confirm a new notification with the lead’s details has arrived.
Delivery can take a few minutes.
08▸ Check the assigned user’s phone.
09▸ Confirm that a new SMS with the lead information has arrived.
10▸ Call the tracking number from a new phone (not previously in Contacts) and wait a moment after the call.
11▸ Go to “Contacts” and open the new caller’s record.
12▸ Confirm the contact owner is assigned from the list. Ownership may take a short while to display.
13▸ [If enabled] In “Opportunities”, confirm a record exists in the “Status Open” card.
If you chose to create opportunities automatically, check “Opportunities” for a new card in the correct pipeline and stage with status set to open.