Optimize your current WordPress setup and content for faster page load times.
Goal: Optimize your current WordPress setup and content for faster page load times.
Ideal Outcome: Your users experience faster page load times and your server resources are more efficiently used while your website still looks exactly the same to the end-user.
Why this is important: As page load time goes from one second to five seconds, the probability of bounce increases by 90%. Without requiring a server upgrade, you can optimize your WordPress website so that it loads faster, therefore, retaining more of your users.
Where this is done: On your WordPress Admin Panel, Pingdom.com and your Google Chrome.
When this is done: Whenever there are pages that can still be further optimized or when your page load times are too high.
Who does this: The person responsible for website management or a web developer.
Prerequisites or requirements: This exact process only applies to WordPress.org sites.
Environment set up
Before starting this SOP, back up your website. You can do so by following the “Create a manual backup” section of SOP 053 (web version).Note: While this procedure is not likely to affect your website’s behavior and functionality, there is a small chance it might be incompatible with your current server settings, current theme or plugins and cause your website to be partially or completely unavailable.
Checking your website performance
Method 1 – Using an external tool:
Note: Using an external tool like Pingdom allows you to test your website by using a third-party server on a designated part of the world, ruling out the possibility that the cause for your website’s poor performance might be due to your current poor internet connection, device, or location in the world.
Using Pingdom:
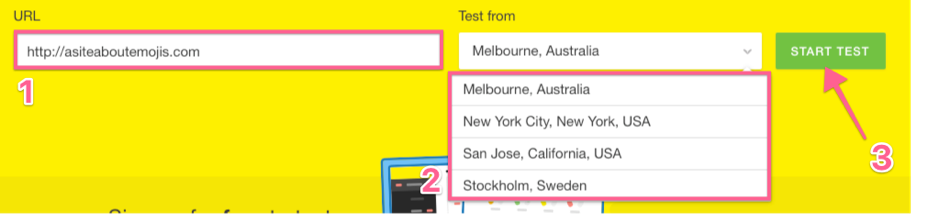
01▸ On your browser head over to https://tools.pingdom.com/.
02▸ Insert the page that you would like to test on the URL field → Select the location that is closer to where your target audience is → Click “Start Test”.
Note: If you don’t know which pages to test, they should be the most important pages on your funnel. (E.g: Homepage, Sales pages, Checkout, etc)
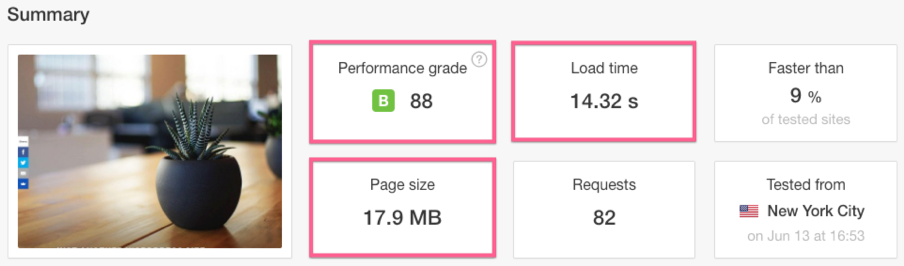
You will get a summary table with some key metrics you are looking for on the top:
Performance grade Your Google PageSpeed score. The higher the better.
Page size: The total size of your page and the amount of data a user would have to download if they requested your page. The lower the better.
Load time: The time (in seconds) it takes for your page to load under great network conditions. Bear in mind that depending on how your page is set, the result may appear to be slightly lower than what it really is. The lower the better.
Save the URL of your test, you will use it later. You can find it on your browser navigation bar on top.

Repeat the procedure for each of your core pages.
Method 2 – Using a local tool (Chrome) updated for Lighthouse
01▸ Open Chrome in incognito mode. Press Ctrl + Shift + N (Windows) or ⌘ + Shift + N (Mac) to open a new incognito window.
02▸ Load the page you want to test.
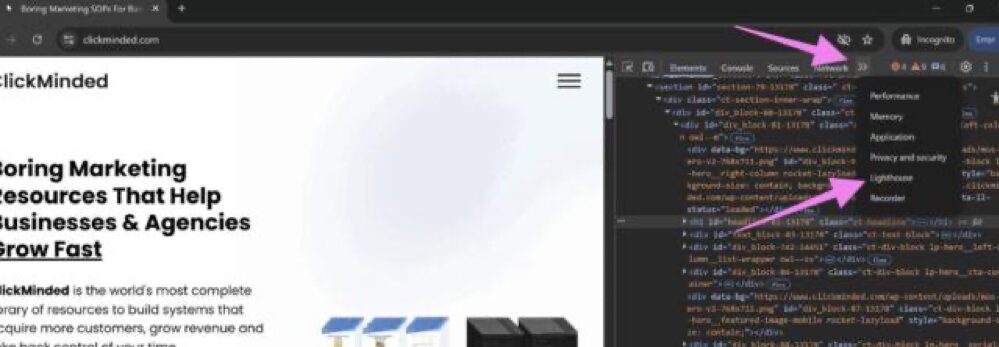
03▸ Right-click anywhere on the page and select “Inspect” or press Ctrl + Shift + I / ⌘ + Option + I.
04▸ Next, click the “»” menu in the top DevTools bar to reveal hidden tabs and select “Lighthouse”.
In Lighthouse, choose:
- Mode: Navigation
- Device: Mobile or Desktop (based on your target users)
- Categories: Keep at least “Performance” selected (others like SEO, and Accessibility optional)
05▸ Click “Analyze Page Load” to start the audit.

06▸ Then, interpret the results.

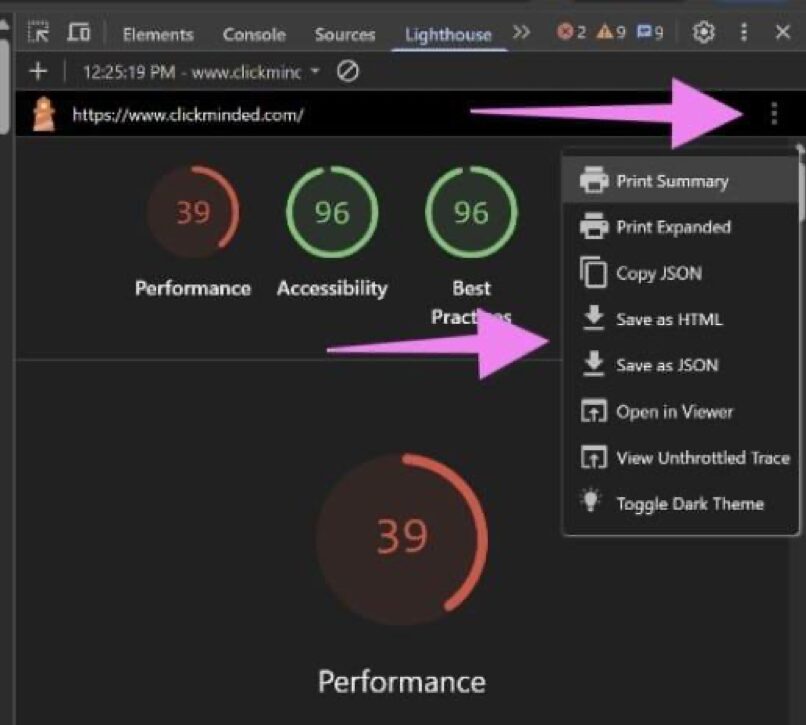
Once the audit finishes, you’ll get a report with:
- Score (0–100): Higher is better.
- Opportunities: Specific improvements (e.g., compress images, defer JS).
- Diagnostics: Technical details on what slowed down the load.
- Timings: Key load metrics with timelines.
07▸ Finally, save the report by clicking on the 3 dots menu (top right of the report) to save a .json or .html version of your Lighthouse report for sharing or records.
Evaluating your website performance
Note: Once the core pages have been tested, it’s important to understand if there is a need to take any action. If you have a low-traffic website, the performance gains might not be as noticeable vs a high-traffic one and a server that is under heavy load.
01▸ Open your Pingdom results page by referring back to the URL you’ve saved previously.
You will benefit the most from this SOP if your Pingdom metrics for your core pages are:
Load Time: > 3s
Page Size: > 3MB
Performance Grade: < C
02▸ Compare your performance against your competitors and some major websites:
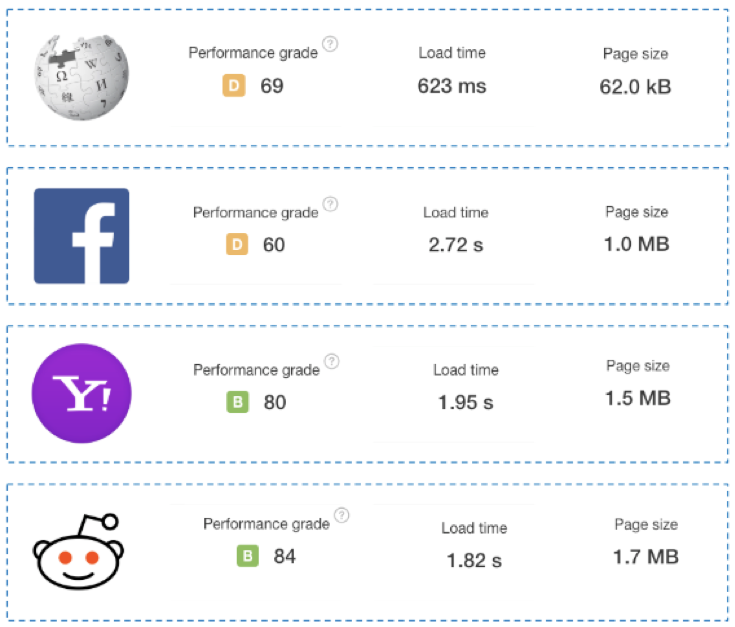
If you believe your metrics are way off compared to the ideal ones or your competitors, keep following this SOP. If not, if you already have good metrics, consider whether your time or the investment in hiring someone to improve your page performance will be worth it.
Further auditing your website performance reports
Open your Pingdom results page by referring back to the URL you’ve saved previously.
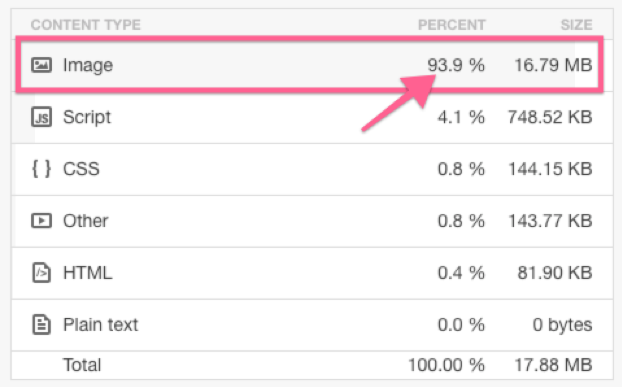
01▸ Locating your largest content:
Scroll down to “Content size by content type” and look for an entry that might be responsible for a big share of your page size. Typically, these will be images or videos.
Now, scroll down the report to the “File Requests” section and sort by “File Size”. You will be able to see which of the files on the top are impacting the page size the most.
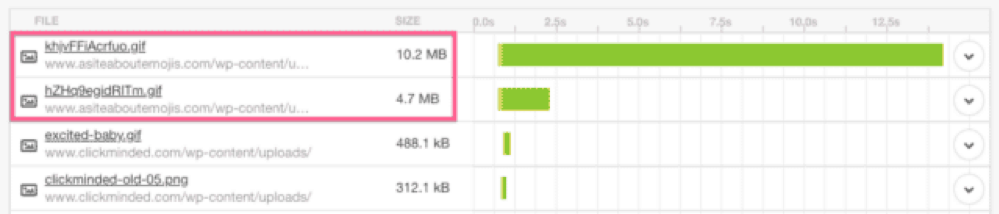
02▸ Ask yourself and your team:
Do we absolutely need to have this file on this page?
Have we optimized this file the best that we could already?
Note: If the files are images, there will be a section on this SOP to optimize images.
03▸ If you conclude that you can remove them, go ahead and ask your developer to do it or edit your page and remove them.
04▸ Locating tools and scripts that you might not be using anymore:
Scroll down the report to the “File Requests” section and analyze the names of the files and the domains. See if you can recognize some tools or scripts that you might not be using anymore.
Example: If you find a request for http://load.sumo.com, you know that your website is loading that tool. If you are not using the tool anymore, you should go ahead and remove it for both performance and security reasons.

Create a list and ask your developer to remove them from your website or remove them yourself. If you are using Google Tag Manager to deploy your tool’s scripts, this task is typically much easier to perform.
Note: If you don’t have Google Tag Manager on your website already, you can follow SOP 004 (web version).
05▸ Locating bad response codes:
Scroll down the report to the “Response codes” section and look for response codes that are not “200 OK”. If all your response codes are “200 OK”, you can move to the next chapter of this SOP.
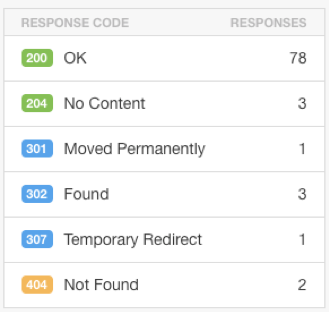
If you have other response codes, locate the individual requests by scrolling down to the “File Requests” section and looking out for highlighted files or the exclamation icon on the left.

06▸ Make a list of those requests and ask your developer:
301/302/307 Redirects: Assess if it is possible to link to the final destination and avoid a redirect.
404 Not Found: This resource is not being loaded most likely because the file does not exist anymore or there is a typo. If the resource is not necessary, this request should be removed from the page.
Decrease your homepage size by showing less blog posts upfront
Note: Depending on your WordPress theme, the steps below might vary slightly. Additionally, it might be the case that you are not currently displaying blog posts on your homepage or your theme does not allow changing this setting. If that is the case, there is no gain in following this procedure, just skip to the next section of this SOP.
01▸ On your browser, log in to your WordPress Admin Panel.
02▸ On the sidebar click “Settings” → “Reading”.
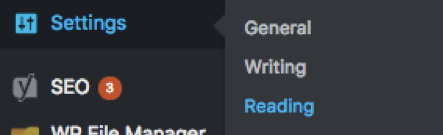
Locate the field “Blog pages show at most” and edit its value. The fewer blog posts you are showing on the front page, the faster your page will load but your readers will also have to use pagination or your homepage links to find your blog posts. Taking this into consideration, lower the value to one that you feel comfortable with.

Auditing your WordPress plugins
Note: This step should be performed not only for performance reasons but also security reasons. Ideally you will want to perform this audit at least every 3 months.
01▸ On your browser, log in to your WordPress Admin Panel.
02▸ On the sidebar, click “Plugins”.

03▸ Filter “Active” by clicking on the link at the top.
Note: If you have inactive plugins that you are not using and do not expect to use in the future, you should delete them for security reasons.
Scroll down the list and look out for plugins that you are sure you are not using anymore or that you could remove without affecting your website’s core features. When you find those, tick the box on the left.
Note: Make sure that you fully recognize the plugin and what it does before checking it. If you are not sure, ask your developer or website administrator about it.
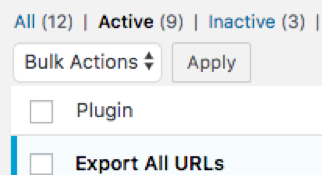
04▸ Once you have selected all the plugins that you are not using anymore, head over to the top, click the dropdown “Bulk Actions” → Select “Deactivate” → Click “Apply”.
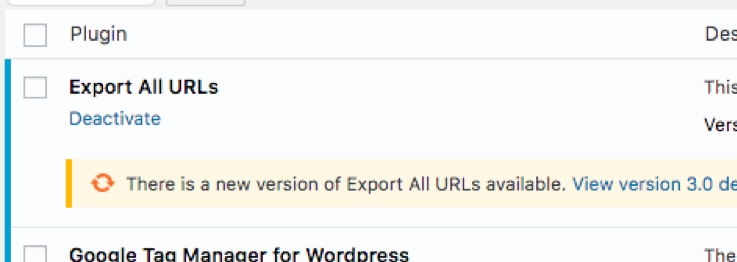
05▸ After you have deactivated the plugins that you are not using anymore, scroll down the “Active” list and look for outdated plugins. These will be marked by a beige background with a prompt to update to the most recent version. Click “Update Now”.
Note: While not always, the most recent versions usually carry performance improvements. Plugins should also always be kept up-to-date for security reasons.

On your browser, navigate to your website and open a few pages to make sure everything is still working as intended after the plugin removals and updates. Visit your core pages (e.g. sales pages, checkout, forms) and make sure everything is still fully functional.
Note: If you are facing any issue, you should first go ahead and re-enable any plugins you might have just disabled, which should fix the issue. Isolate plugin that is causing the malfunction by disabling them back one by one and checking when your issue arises again.
Note 2: If, for some reason, re-enabling your plugins does not fix your issue, you can always restore your website from a backup by following the “Restoring from a backup” section of SOP053 (web version).
Install the WordPress W3 Total cache plugin
Note: While installing a performance optimization plugin like W3 Total Cache can have a very significant impact on your website performance, it can also cause your website to malfunction. Before proceeding to this step make sure:
You are working on a local development environment (e.g: a staging version of your website)
or/and
You have fully backed up your website and have a restoring solution at hand. You can do so by following the “Create a manual backup” section of SOP 053 (web version).
If you are not working on a local development environment but are fine with having a bit of downtime until you restore the data from your latest backup, you can also proceed to this section.
This SOP tries to cover the best settings that would work for most websites but compatibility with every possible website/server setup can’t be achieved. If you are having trouble setting up your cache plugin, contact your web developer or hosting company.
Note 2: Make sure you are not using any cache plugins since that might conflict with this chapter of the SOP. To do that, go back to the “Auditing your WordPress Plugins” section of this SOP and make sure you do not find any plugin that mentions any cache feature.
01▸ On your browser, log in to your WordPress Admin Panel.
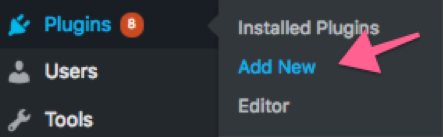
02▸ On the sidebar, click “Plugins” → “Add New”.

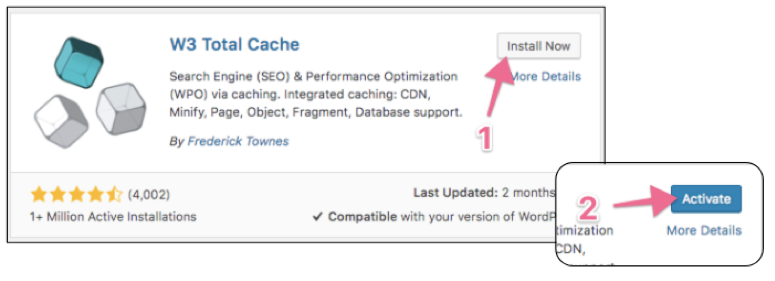
03▸ On the search bar on top, type “W3 Total Cache”.

04▸ On the search bar on top, type “W3 Total Cache” → Click “Install Now” → “Activate”.
05▸ On the sidebar, click “Performance” → “Dashboard”.
06▸ Click “Compatibility check” on top.
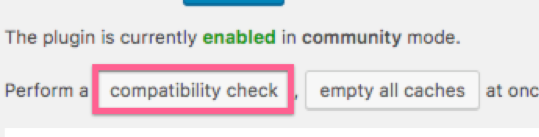
07▸ On the list, look for incompatibilities of your server settings with the “enhanced page and browser cache”.
![]()
Note: If you have an incompatibility with the enhanced page cache feature, inquire your webhosting company about it and ask if they can provide you with a solution.
08▸ On the sidebar, click “General Settings”.
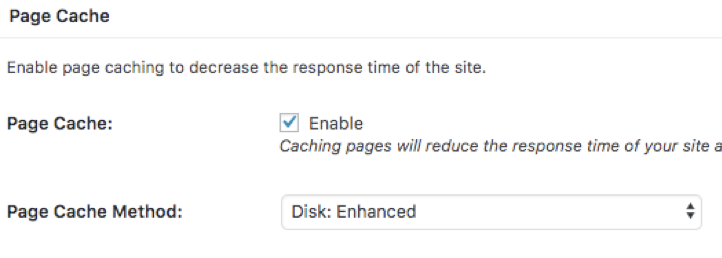
09▸ Select the following settings:
Page Cache: Enable
Page Cache Method: Disk: Enhanced.
Note: If you’ve detected that your server settings are not compatible with the “Enhanced” option on your previous step and your current webhosting provider can not offer you a solution, select “Disk: Basic”. Also note that there is a small chance the W3 Total Cache’s “compatibility check” tool’s alert is a false flag and your server actually supports the enhanced mode.
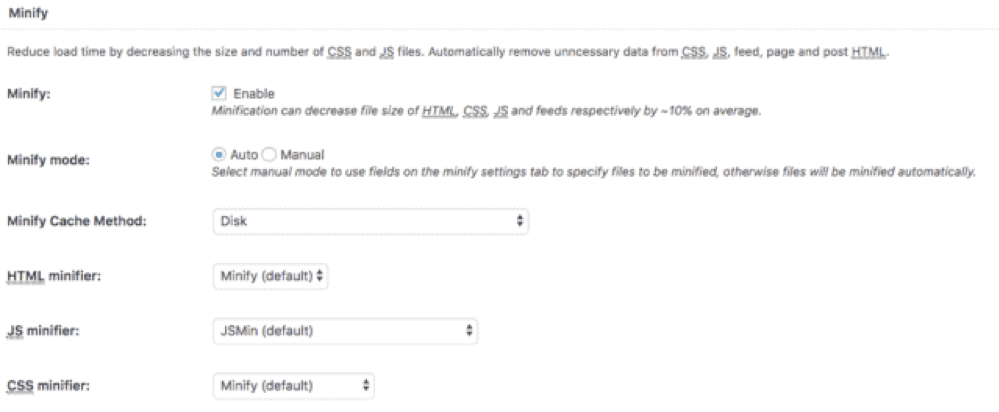
Minify: Enable → “I understand the risks”.
Note: While this option will work for most websites, it might cause your website to malfunction. If you are already using a minification plugin or service, do not enable this feature.
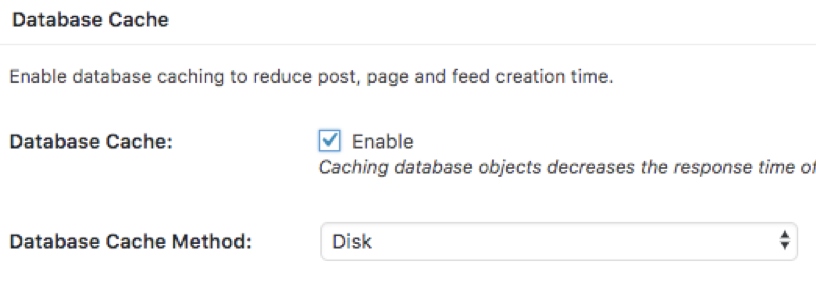
Database Cache: Enable
10▸ Click “Save Settings and Purge Caches”.

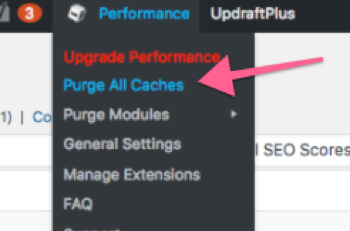
Note: If you still see a notification on top prompting to empty the cache, go ahead and do the following:
![]()
Open your website, navigate through your core pages and make sure everything is still functional.
Note: If parts of your website are no longer working, you can revert the changes you made by either disabling individual features or disabling the whole plugin.
Note: Since you’re now displaying a cached version of your website to your users everytime you make a change to your website (e.g: editing a page), you will want to purge that page’s cache so that your website refreshes the content that your users are seeing. You can do that by either hovering the WordPress Admin header’s “Performance” icon and clicking “Purge All Caches” or purge only specific caches (more efficient) by clicking the “Purge from cache” next to your WordPress posts and pages.

Installing the Shortpixel Image optimizer plugin
01▸ On your browser, log in to your WordPress Admin Panel.
02▸ On the sidebar, click “Plugins” → “Add New”.
03▸ On the search bar on top, type “ShortPixel”.
04▸ Click “Install Now” → “Activate”.

05▸ On the sidebar, hover “Settings” → Click “ShortPixel”.
![]()
06▸ You will be prompted to add an API key or request one. If you don’t have one yet, enter your email address, tick the box to accept the TOS and the PP and click “Request Key”.

07▸ You should see a “Your API key is valid” message and be redirected to the Plugin Settings page.
08▸ Select the compression setting that you would rather see on your website.

Note: You can test the three different settings live on ShortPixel’s website here. If you are not sure, select “Lossy”. This will offer you the best results while still making sure your images look good.
09▸ Click “Save and Go to Bulk Process”.

10▸ Click “Start Optimizing”.
Note: The free plan allows users to optimize up to 100 images per month. If you already have more than 100 images when you’re starting out, you may want to purchase a “One-Time” plan that suits your needs. Afterwards, if you don’t plan on adding more than 100 images per month, the free plan will be enough.
Note 2: If you include thumbnails and you go over your allowed monthly quota, you may choose to disable that option.

Leave the tab open while the plugin optimizes your images. Depending on the amount of images you are optimizing, it may take several minutes.
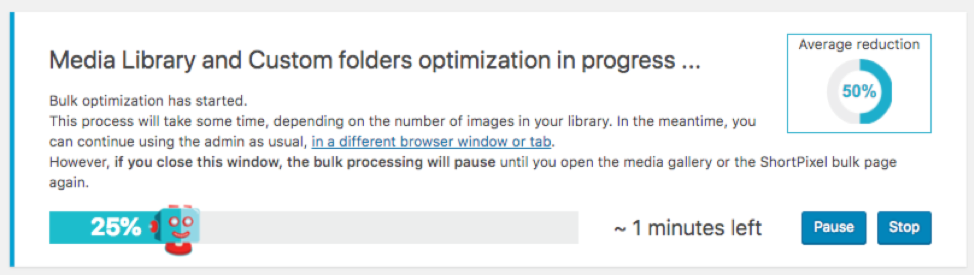
That’s it! Your images are now optimized and your pages and posts should now be lighter and faster to load. To the right of the success notification, you should see a percentage indicating the average image reduction.

Note: If you are using a cache plugin, you might need to purge all caches before your newly optimized images are live.
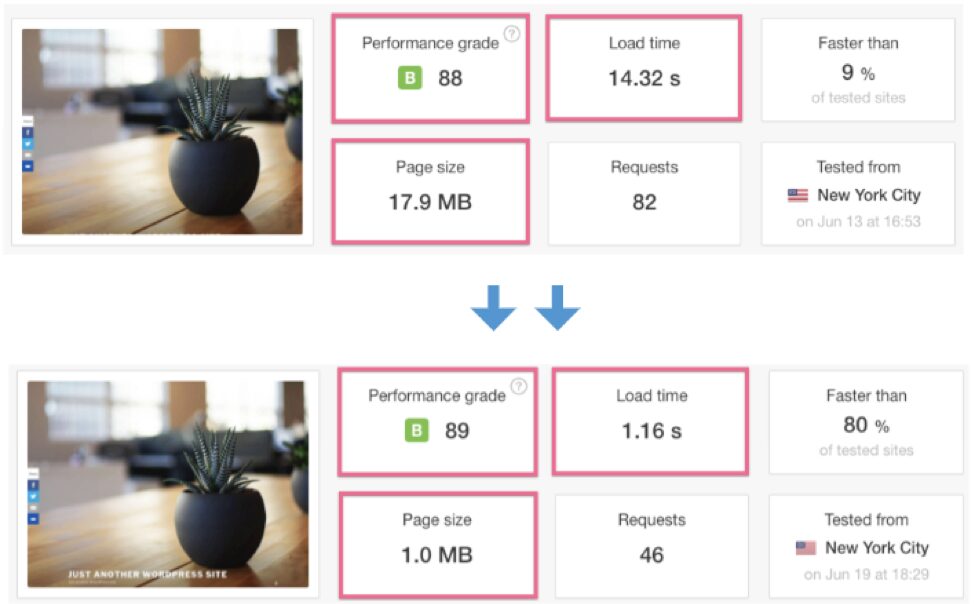
Re-test your pages
After you have applied all of the steps above or some of the optimizations of this SOP, retake the tests that you have performed on your pages in the first chapter of this SOP and compare the results to see how much your page performance metrics improved.
Note: Make sure you select exactly the same server locations when performing the new tests.
That’s it! If you’ve implemented all the chapters of this SOP, you should already have gained a considerable performance improvement.
Note: If your page load times are still not at the level you would want them to be, consider different additional solutions (outside of the scope of this SOP):
- Implement, or ask a developer to implement, a CDN;
- Consider upgrading your web hosting plan or move to a faster web host;
- Consider switching to a lighter WordPress theme, or redesigning your website with performance in mind;
- Hire a web developer to take your page-performance efforts even further.